| LaymarCrafts Woodturning | Hints & Tips |
| Grinding Jig Pt II |
In part 1 of this article I described how I made the two "Standard Type" Rests for the Bench Grinder, in part 2 I describe how I made a Gouge Grinding Jig.
This type of Jig is readily available from a number of manufacturers but due to the cost and the fact that most did not match the basic requirements, I perceived I would require, I set about making a System of my own.
My basic needs were for a Jig that gave me adjustment both Horizontally and Vertically for the reasons illustrated below, and a System that was always to hand and ready for use, if I could achieve this I thought I may pay more attention to Sharpening and also carry it out on a more regular basis.
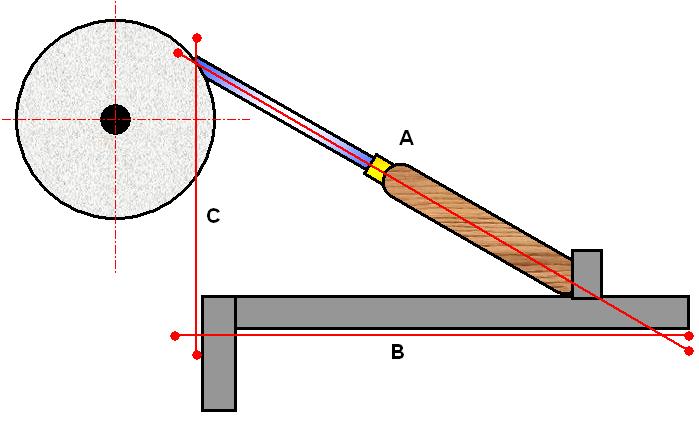
The Angle of the Bevel on any Gouge will be dependant on the Length of the Tool "A" and any one of the other two dimensions, therefore to maintain any given Bevel Angle for any Length of Gouge "A" then both "B" and "C" must be adjustable.
With this Jig and the two ways of adjustment I found you can control the final Grind Angle according to the Length of the Gouge and it's Handle.
The basis for the Jig was, again, two lengths of the Aluminum T Section Channel used in part 1, one piece as the Horizontal Support for the "V" Slide to locate the Gouge Handle and the second piece acting as the support for the Horizontal Support and for the Vertical Adjustment.
|
|
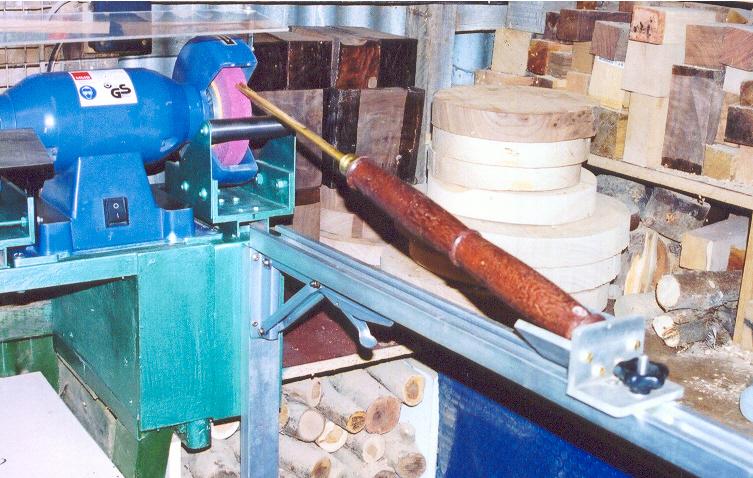
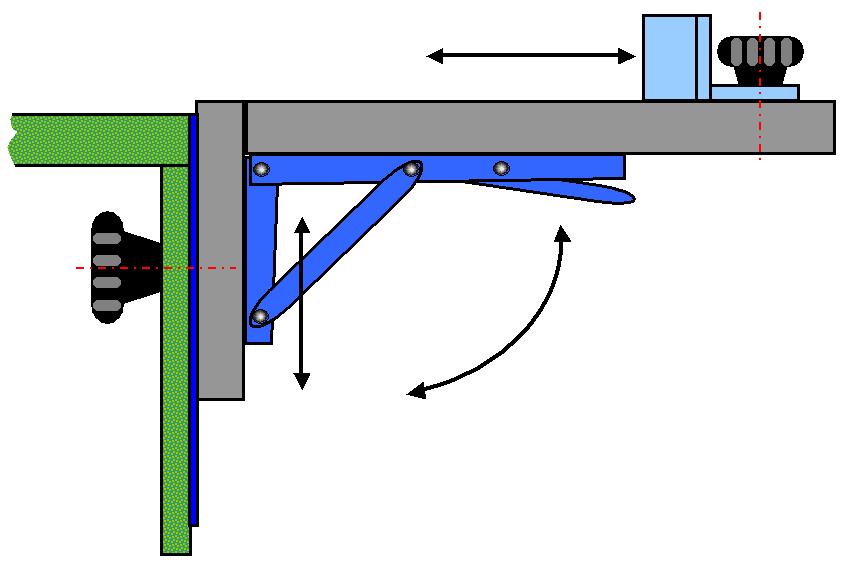
In the Picture above you can see the Jig in use with the "Bar Rest" acting as a fail safe, preventing the Tool from Digging into the Grinding Wheel.
You can also see the Quick Release Folding Bracket ( typically as used for fold down Tables, Shelves etc. ) which enables the Jig to be always in place, yet does not get in the way when not in use, see the picture below.
 |
In
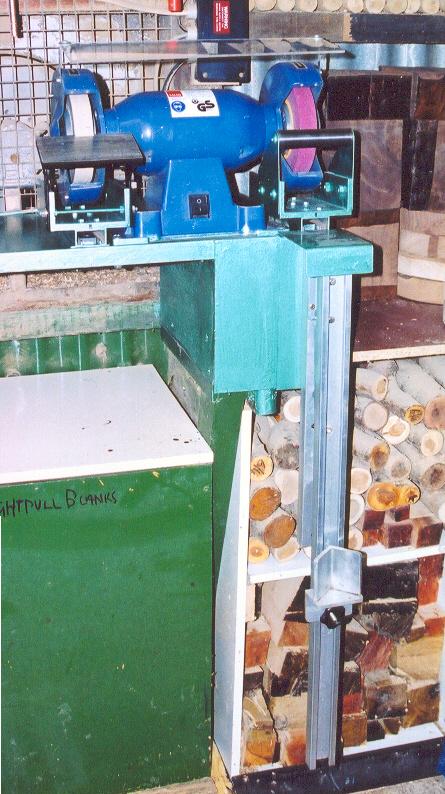
this Picture you see the Jig in it's Folded Down position with a simple
cover plate over the end to prevent any Abrasive Debris, when Free Hand
Grinding, getting into the
Hinge Pivots and causing excessive wear.
The cover plate is held in place by a length of self adhesive Magnetic strip and the cover is removed when the Jig is in the Up Position. The length of Aluminum Channel used for the Vertical Adjustment I made twice the distance from the top of the Grinder support platform to the center of the Grinder, in my case this was 150mm (6") so the piece of Channel used is 300mm (12") long. The Horizontal Channel needs to be as long as your longest gouge + 75mm (3") but at the same time when in the Folded Away position it must not of course hit the Floor. Mine is 850mm (34") long and suits my current requirements but should I ever own a longer Gouge then I can add a detachable extension if necessary. The Hinge I used was not particularly expensive and I found the Pins used as the Pivots were too loose and the Jig had too much movement in use, I overcame this by replacing the Pins with suitable Bolts and used Nylon Washers to give a firmer assembly. I find a general clean up, of all the Jigs, followed by a good spray of Dry Silicone/PTFE into all joints will ensure that undue wear and tear does not take place. |
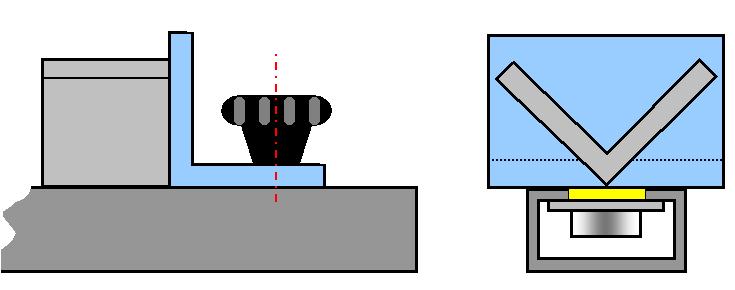
The whole assembly is supported of the Grinder Platform with the RH Wheel of the Grinder utilised, a vertical MDF platform is attached to the "T" frame of the support this has a Metal Strip attached to it generally as described for the Slides in part 1, and I used exactly the same format for adjustment and locking as before. The principle is shown below.
 |
The adjustable locator for the Gouge Handle is formed from two pieces of 50mm x 50mm x 6mm (2" x 2" x ¼")Aluminum Angle (or any other suitable material) as can be seen in the pictures above and illustrated below, The piece of Angle forming the "V" can be either Screwed or Welded to the other piece of Angle to form the "Handle Cup".
The adjustment is via a "T" Bolt and Knob as used for the adjustment on the Standard Rests detailed in part 1 of this article.
|
|
Once Set Up for the Gouge in current use a quick visit to the Grinder, Flip up the Jig and the Gouge is ready for a quick Sharpen and therefore ensuring a Quality Cutting Edge without any delay.

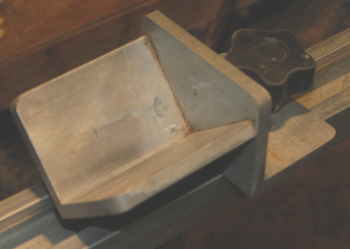
The adjustable locator for the Gouge Handle
In a later article I will detail some additional Jigs and Attachments I have made for the Grinder including a simple Angle Finder, Fingernail Jig for the above setup, Wheel Dressing Guide plus many other Tips.
Some of you have indicated that you have had difficulty finding the Aluminum Channel as used above, I understand that two Steel variants, Unirail and Unistrut are more readily available and these have been used successfully by some of you who have made these Jigs.
![]() Part I of the Grinding Jig Article.
Part I of the Grinding Jig Article.
|
|
|
LaymarCrafts Woodturning is the Web
Site of Richard & Sheila Stapley Last update 19 July 2007
|
|
Web Site Design & Construction by Richard Stapley. |