| LaymarCrafts Woodturning | My Workshop |
Here I present a 360° Photographic look at my Workshop or the Shed, which it really is, I point out some of the many projects included, or due to be included, in my Hints and Tips section of this Web Site.
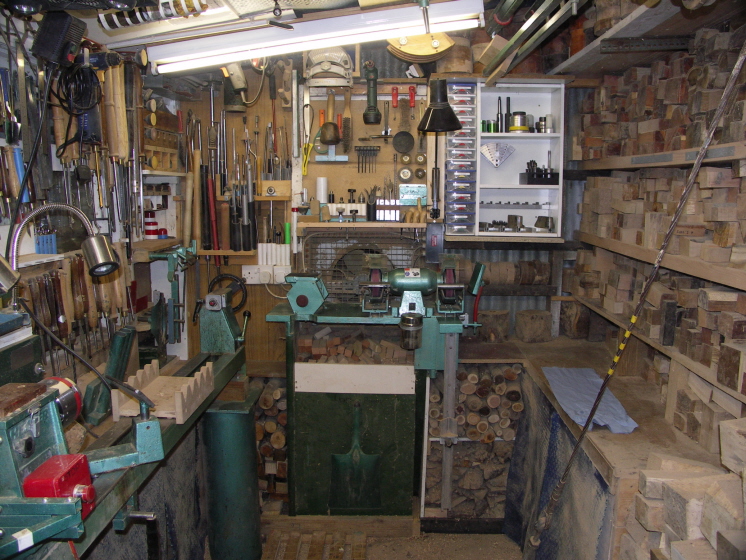
Looking East with the Hegner Lathe on the left and the Bench Grinder/Mini Sander on their platform in front of the Vent Fan, the area below this is where I save all those off cuts that one day will become a Light Pull.
The Lathe Support which comprises of two Sand filled Pipes, can be clearly seen, as can one of my Shop Made Flexible Lights for the Lathe.
My main Tool Grinder with its fold down Jig and the Wing Mirror, attached to the front of the Grinder is the Cooling Water Container and the upgraded Spark Guards can also bee seen.
My Turning Tools hanging on their Pegs just to the right and behind the Lathe, with the Tool Holder on the Lathe Bed, you can also just see my Light/Fan Box above the Lathe [top left in picture] plus my new remote On / Off Switch Box.
In the far corner is my Abrasives Store and many of the Tool Rests I have, also find a home here, behind the Blue Plastic seen below the Lathe Bed is more Wood which is protected from all the Shavings and Dust I produce.
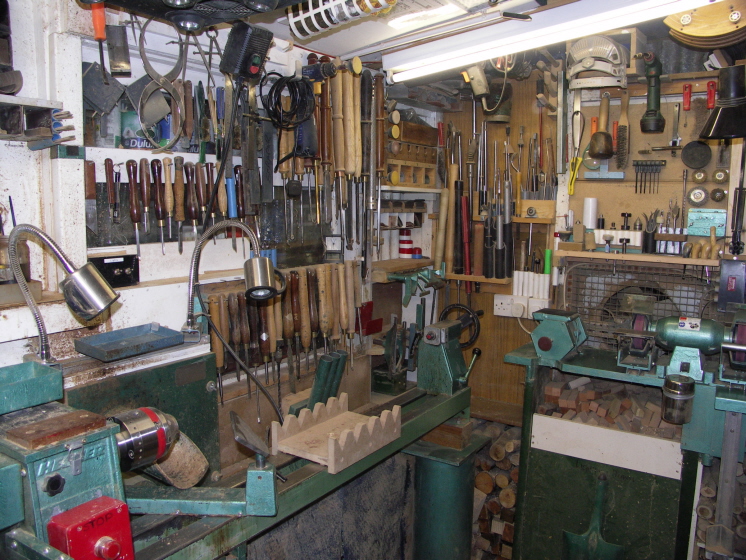
The entrance to this area of the Workshop is from an extension to the Shed where I have the Belt Sander, a Pillar Drill and my Kiln plus numerous other items associated with my Turning, including more Wood Blanks and my Tormek Sharpening System.
This photo shows quite clearly my Dust Extraction System which is connected to the Dust Extractor which is the other side of the wall in Extension 2 of the Shed, just behind where the Smaller Turning Tools are hanging.
You can also see the separate Dust Extractor I have coupled up to the Bandsaw, plus the two Flexible Lights for the Lathe and my Paper Towel Holder [With it's vivid Orange AAW Safety Warning Sticker attached].
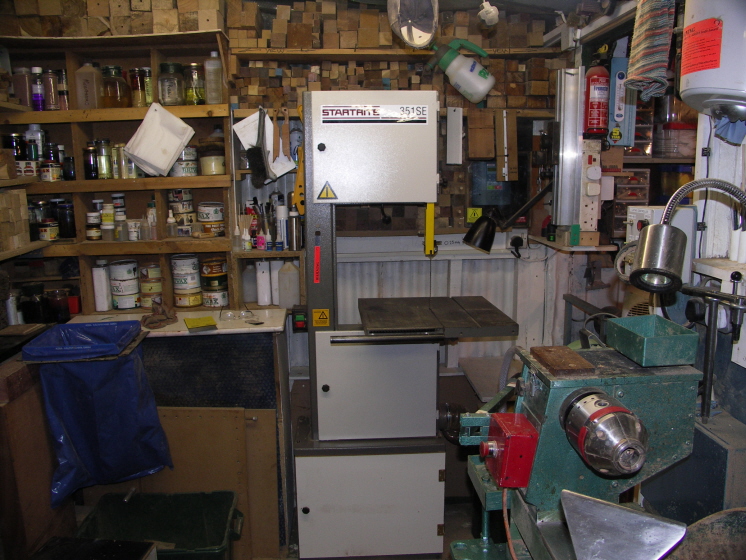
The Bandsaw which is a recent upgrade and perhaps one of my best buys, the Startrite range is a no frills basic piece of kit without any of the unnecessary, in my opinion, gizmo's that seem to adorn Bandsaws these days, this is a Solid well Engineered Machine that I could recommend to anyone.
To the left of the Bandsaw is the area where I keep all my Finishes and associated Materials, Fluids such as Thinners and Dyes, I also have various grades of Superglue and Accelerator etc.
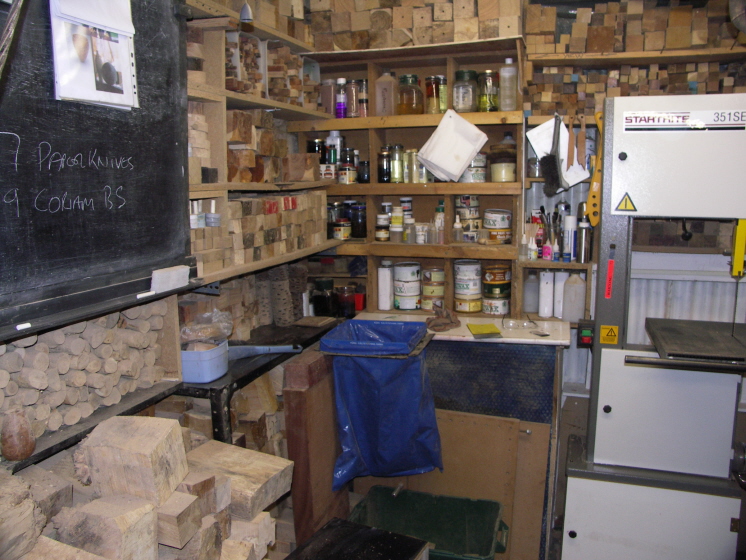
Here you get a better view of the Finishes Storage and also my Rubbish Area with the Blue Waste Bag in it's Holder and below a large green plastic bin where I throw all the waste from the Bandsaw, which is in turn Burnt on the Wood Burning Fire we have in the House.
To the left is my Blackboard for all those reminders of things to do or sketches of what shape I am trying to achieve, this board is removable and behind it is where I keep all the Carriers/Sleds for my Baseboard System.
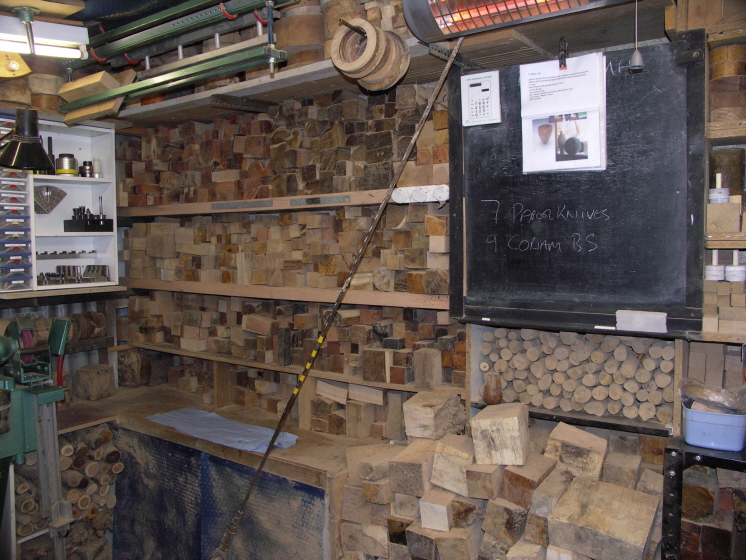
Finally a picture of just some of my Wood Store which as you would have noticed is practically all around me in the Shed, not to mention in other areas inside and out, some is also stored behind the Blue Plastic Curtains whish helps to keep it out of the Dust.
Above the Blackboard you can see my Heating System which is an Infrared 2kW Heater which is adequate for the Area I need to Heat and is very Safe with no open contact possible.
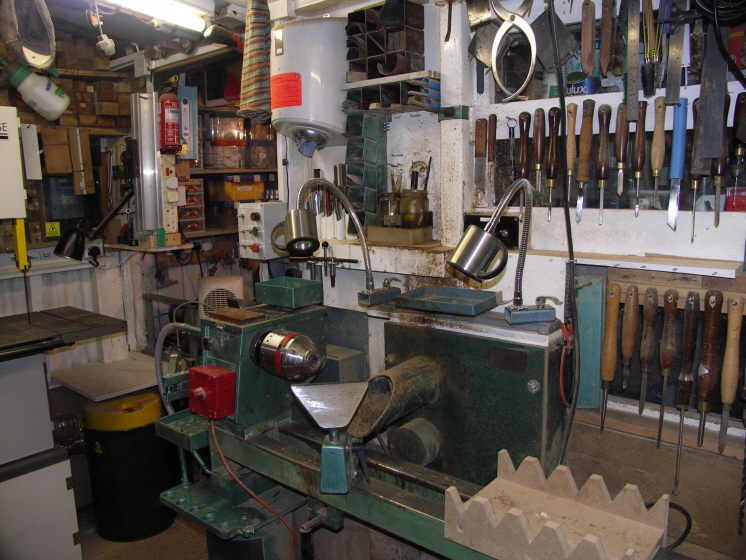
You can also see my Chuck Storage Cupboard [minus its door] and just above it, to the right, is my Deep Boring Bar System hanging on large Hooks screwed into the Roof Beams of the Shed.
And I know you are all dying to know what the Wire Cable with the Yellow Bands on it is! well adjacent to my Shed is a Large Telegraph Pole and this is the Bracing Cable that passes through the Shed Roof, the Cable preceded the Shed so I have to just put up with it.
Adjoining the Main Woodturning area I have an annex which contains my Kiln and a Pillar Drill whilst along the other side I have various machines, tool chests plus plenty of storage space for mostly the added value items used in my Woodturning, i.e. Corks, Knife Blades, Coaster Tiles and Potpourri Lids etc..

Here you can see, from right to left, an 8" Grinder with shop made Rests similar to those for my 6" Grinder, above the Grinder is a Drill Sharpener, which I have had for years and never used until I retrieved from a Tool Box and set it up in a permanent position so now I have no excuse not to Sharpen any Drill as and when necessary.
Next in line is the Tormek, with all the necessary attachments close to hand as well as the Instruction Leaflets [Laminated], The Tormek sits into a retaining frame which enables me to turn it around so that I can Sharpen in either direction, towards or away from the edge, when necessary.
Below the shelf where these two sit is an open storage area for Jigs and Fixtures, beyond the Tormek is the Belt Sander with a Polishing Mop attached, both the Polishing Mop and the Belt Sander have additional Guards for Containment and Protection, the one fitted to the Top of the Belt Sander prevents the Sparks generated, when using the Belt Sander with Metal, from hitting you in the Face and in particular your Eyes when you do that rush job and forget your Eye Protectors.
Finally just out of view next to the Belt Sander is my Shop Made Disc Sander, whilst the Cupboard below houses the Waxer which was adapted from an old Chip Fryer.
The Wood Stack to the right of the Waxer Cupboard is now gone and in its place I have an Air Compressor, this addition to my Workshop has been a worthwhile investment making the cleaning of Machines, Attachments and Tools on a regular bassis an easy task.
New Addition to the Shop:-

I now have a Mini Lathe, an Axminster M330, which is similar in specification for a whole series of Lathes from the likes of Jet, Fox, Penn State Etc. Etc. It is very useful for Turning small items whilst waiting for Finishes to Dry on the main Lathe.
It is slotted in below my Chalk Board on a simple platform with Timber Storage below and various Pigeon Holes and Tool Holders adjacent, as their is no Dust Extractor in the vicinity I have a small Fan creating a down draft above the Lathe to force any Dust down rather than up into my Face.
From Wood to Metal:-
I now have a small Metal Turning Lathe to enable me to expand my Machining Capabilities when Designing and Making new Woodturning Tools or Jigs.

To accommodate the Lathe I had to make some adjustments to my Kiln by removing the Forced Air Drying Section and the Pillar Drill needed to be moved, which is now a bit cramped, but still useable for my everyday Drilling.
Like
most of the Machinery in my Workshop, the Lathe has already undergone some
Modifications and Upgrades.
|
|
|
LaymarCrafts Woodturning is the Web
Site of Richard & Sheila Stapley Last update 16 July 2007
|
|
Web Site Design & Construction by Richard Stapley. |