| LaymarCrafts Woodturning | Hints & Tips |
| Marking Out Templates |
For many years I have been buying the bulk of my timber needs in plank form and cutting my own circular blanks, marking out the various sizes with a compass.
The time this was consuming and the wastage that I was generating was brought home to me when I was negotiating the price of a rather expensive piece of Brown Oak, I asked the supplier how many 150mm [6"] blanks would I get from the piece.
He produced a 150mm Circular Template and within seconds had marked out 7 such blanks with some spare for 3 off 100mm Ø [4"] blanks.
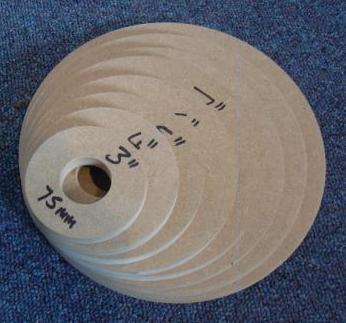
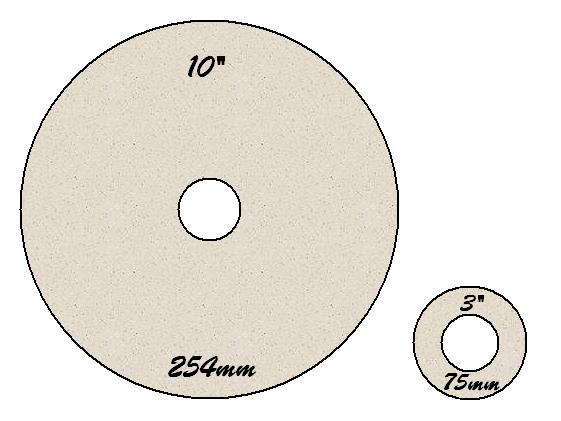
I was reasonably impressed that on my return I went straight to the Workshop and prepared some similar discs from 75mm Ø up to 254mm Ø [3" to 10"] in all I made 8 at 25mm [1"] increments.
75mm [3"]
101mm [4"]
127mm [5"]
152mm [6"]
178mm [7"]
203mm [8"]
225mm [9"]
254mm [10"]
I then Drilled a 32mm [1¼"] hole with a Forstner Bit two thirds of the way through the centre of each piece and mounted them on the Lathe using the Mini Gripper Chuck and turned to the final diameter.
After removing each one from the Lathe I carefully drilled the centre hole all the way through with the same Forstner Bit.
|
I used MDF but any suitable material will do although I do recommend that they are at least 12mm [½"] thick as this will be useful for marking out blanks of a slightly larger size than the discs. By using the Pencil upright around the edge which gives for example a 165mm Ø [6½"] blank from the 152mm [6"] disc or by slipping a sleeve onto the Pencil and therefore making it a larger diameter you can create various sizes. It will also support the centre finder/marker that I detail below for marking the precise centre of the Blank whether it be one you have marked and cut yourself or a bought in Blank without any centre marking. You can of course make any size of disc you require. I find that I get a much better visulisation of what I can cut from a plank of Wood and in doing so, I believe, I have less wastage or should that be fewer off cuts, i.e. Light Pull Blanks, Bottle Stopper Blocks etc. etc. cluttering up the Workshop and gathering Dust. |
|
I can also readily choose which side of the Blank to centre mark, either from my own production or any bought in Turning Blanks I may purchase.
When not in use they hang on a length of 1" pipe attached to the wall of the Workshop.
Centre Finder/Marker
One problem that I immediately became aware of was that I now did not have the benefit of the centre point made by the point of the compass that I had previously used before.
I soon realised their was a solution and a hunt through old odds and ends soon gave me the bassis of a very effective centre punch.
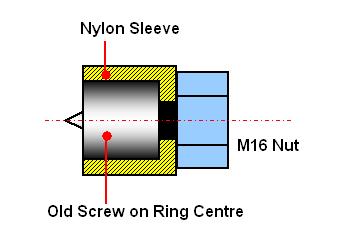
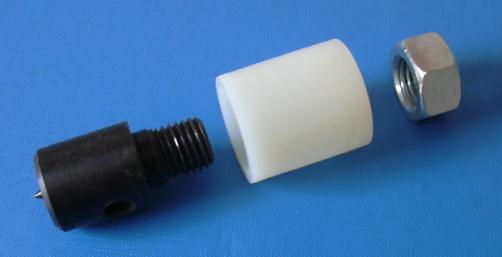
| I
started with an old Ring Centre Bit from a Revolving Centre that I had
never used.
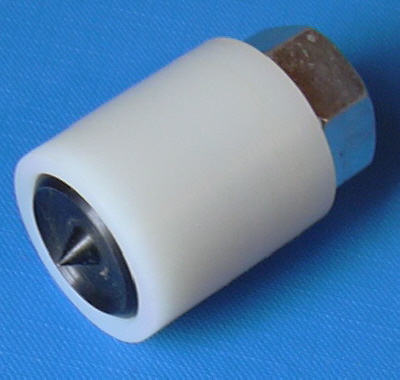
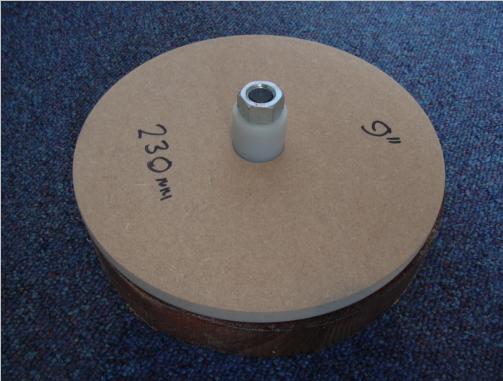
Some 40mm Ø [1½"] Nylon 66, I had bought on E-Bay for a few pence, turned as shown to 31mm Ø [1¼"] to slip easily into the centre hole of the discs. And an M16 Nut to match the thread on the Ring Centre Bit clamped it all together and at the same time formed a striking head that would take constant hitting with a Hammer. The picture below shows the parts before they were assembled, the Nut will act as the Anvil for hitting with a Hammer to transfer the Centre Mark onto the Wood Blank. The Nylon Bush is there to make up the difference in diameter between the Ring Centre Bit and the hole in the discs, it of course could be made from a suitable piece of Hardwood. The Assembled Punch in the picture to
the right and below the Punch in position ready to be lightly tapped with a Hammer
to mark the centre of the Blank below the disc. |
|
 |
|
|
 |
|
|
|
LaymarCrafts Woodturning is the Web
Site of Richard & Sheila Stapley Last update 06 May 2008
|
|
Web Site Design & Construction by Richard Stapley. |