| LaymarCrafts Woodturning | Hints & Tips |
| Bench Grinder Modifications & Aids |
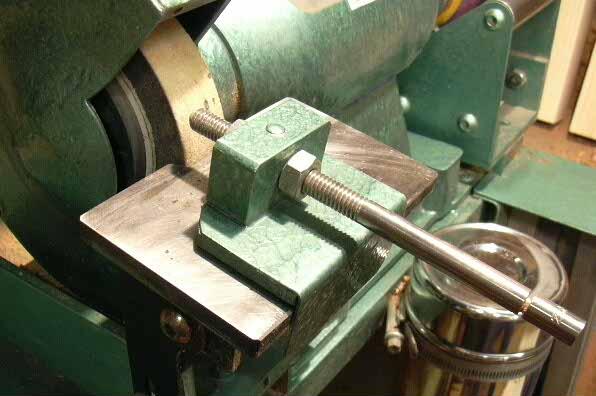
Diamond Wheel Dresser Guide
I use a Diamond Dresser for Truing the Wheels of my Grinder and this comes in the form of a Metal Bar with an Industrial Diamond inserted in one end.
To support the Diamond and make it easier to control I made a simple holder and guide for use with the Flat Grinder Platform described in a previous Article.
The Bar holding the Diamond is 9mm Ø [3/8"] and is therefore ideal for Threading as shown, simply mounted in a block of Metal [ I used Aluminum] screwed to an Angle Plate you have a firmly supported Diamond that can be guided across the Wheel for a perfectly Square and Dressed Wheel.
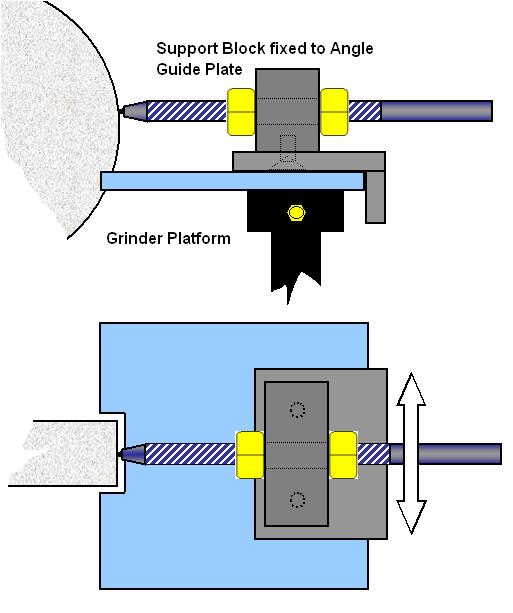
Adjustment is made using the two Nuts simply by loosening the rear Nut and tightening the front Nut the Diamond end is moved forward to give the required protrusion for Dressing each Wheel.
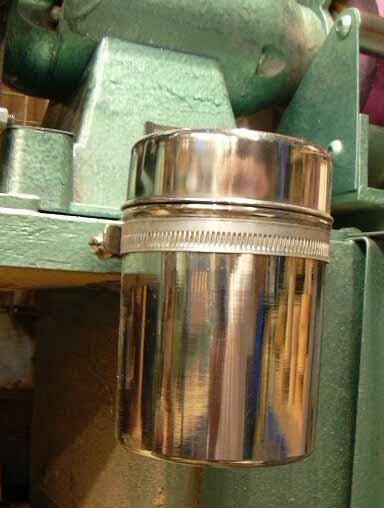
Water Holder for Quenching
One problem with the High Speed Grinding of Tools is the Heat that is generated at the Tool Head, this needs to be Cooled, by Quenching in Water, regularly when Sharpening.
As we are all aware any open receptacle containing Water in the Workshop is going to get contaminated with Wood Dust and loose its effectiveness as well as becoming very messy.
I also found that I was constantly knocking over any free standing container that I was using to hold the Water and set about finding the best solution to overcome both of these problems.
|
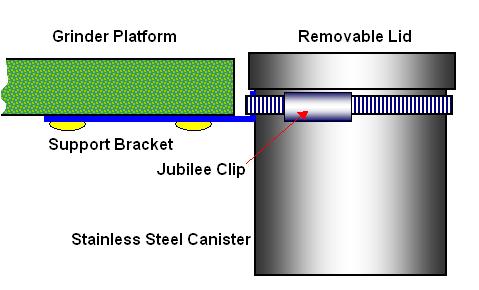
Attached to the Grinder Platform by using a simple Angle Bracket and Jubilee Clip as shown in the Picture right. |
A
Stainless Steel Tea Canister from the local Hardware Shop was ideal,
being made from not only a Non-Rusting and Un-Breakable material but
also comes complete with a well fitting Lid.
|
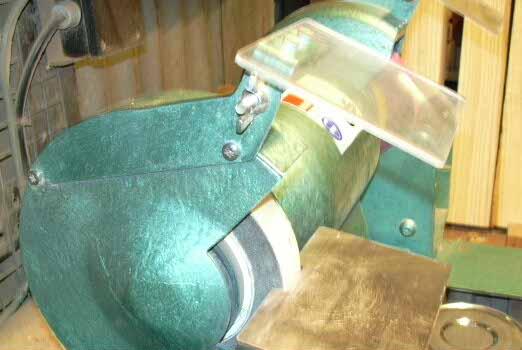
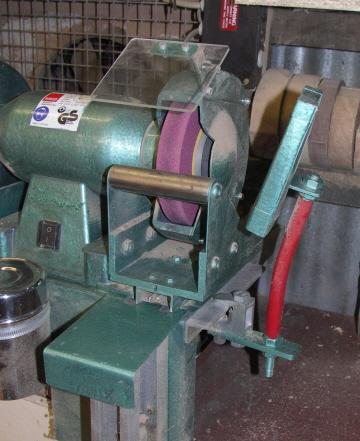
Spark Guard Up-Grade
Bench Grinders often, in my opinion, come with inadequate Spark Guards which are too small and either break or crack within a very short period, I have up-graded to a more substantial Guard using a 100mm x 90mm [ 4" x 3½"] piece of Plexiglass in place of the 50mm x 50mm [2" x 2"] pieces of Plastic originally supplied.
| The
Plexiglass Guard is bolted to an Angle Bracket with two small bolts, I
used Nylon Bolts which I obtained from a Car Accessory Outlet.
A Support Plate was cut from Sheet Steel and fixed to the outside of the Wheel Cover using the original cover plate fixing screws. Finally the Angle Bracket is attached to the Support Plate with a M6 [¼"] Screw and Wing Nut to enable the Guard to be adjusted up or down to suit. I find this gives me better all-round protection, particularly when viewing the item being ground from either side rather than face on. The Pictures at the bottom of this Page clearly shows the Set Up. |
|
Grinder Trough Cover Up
My Bench Grinder has Troughs either side of the Motor Housing and I can only imagine these are a left over from earlier designs where these Troughs were filled with Water for Quenching what ever was being Ground.
They were annoying me as they soon filled with Wood Dust and the thought of a Spark igniting this and the consequences were sufficient for me to simply cut a strip of thin Sheet Steel to make a cover which I stuck, with Epoxy, over each Trough.
In the pictures at the top of the page and also the final pictures of this article you can just see the Covers.
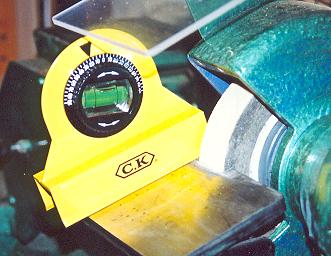
Angle Finder
Grinding in every sense is about Angles and therefore any item that can assist in obtaining the correct Angle is an advantage and the Tool I detail below is simple and effective and readily available from most Tool Suppliers.
| I
purchased this Angle Finder from my local Hardware Store and soon
realised it would be an ideal Angle Setting Tool for not only the
Grinder Platform but also the Bandsaw Table or in fact any Tool
Table/Platform.
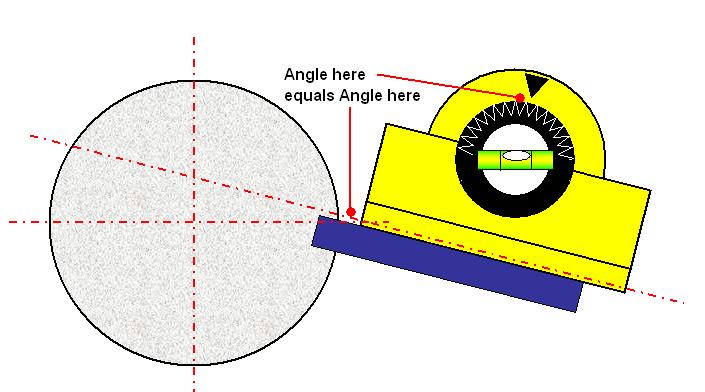
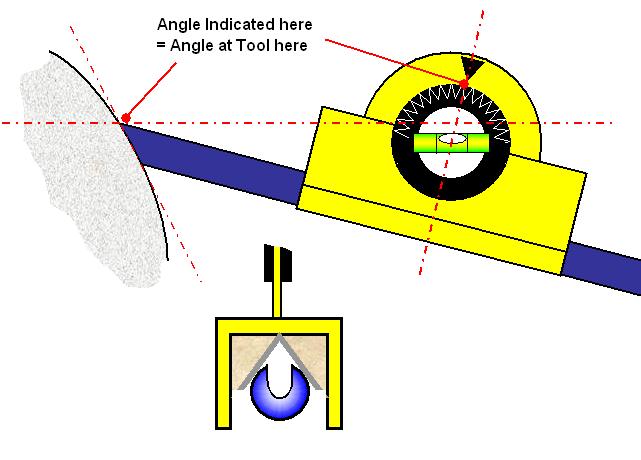
With the modification described below it can also be used for setting the correct angle when Grinding a Gouge. Place the Angle Finder on the Table with the Protractor set to the desired Angle, you now adjust the Table so that the Bubble of the Spirit Level is in the center of the two markings.
|
|
For use with the Gouge you will need to modify the Angle Finder by adding a "V" within the channel base, this I done by taking a length of Aluminum Angle [15mm or 9/16"] and fixing it using Epoxy inside the channel base as shown below.
The principle of using this form of Angle Finder is of course dependant on the Grinder [or any other Tool] being level and this in practice should not be a problem, however you should check the set up and make sure the Grinder and its Platform are Square and Level.
This handy little item, as already mentioned, has many other uses around the Workshop, Setting Angles of, the Bandsaw Table, Belt Sander Guide, Adjustable Lathe Platform [Future Hint & Tip], Drill Press Table, in fact anything requiring an Angle setting.
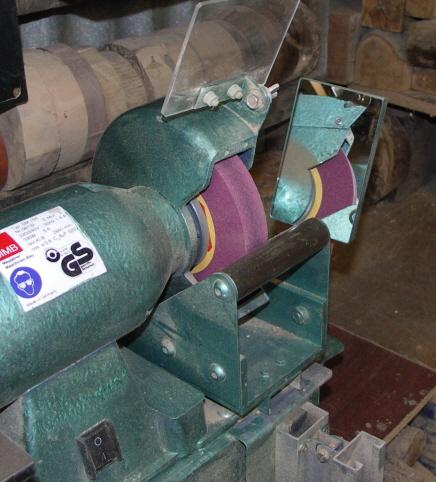
Wing Mirror
The one problem I found when using the RH Wheel of my Bench Grinder was that due to lack of access on this side I could not easily see what was going on when Grinding some Tools in particular when using the Fingernail Jig.
| My
solution was to fit a "Wing Mirror" onto the Bench Grinder,
this allowed me to see the progression of the Grind without having to
lean over
to get a better view.
I used a Stick On Vanity Mirror obtained from a Vehicle Accessory Shop but any suitable Mirror would be ok. The Mirror is simply attached to a piece of MDF and supported off of a length of Aluminum Angle attached to the support platform of the Bench Grinder. An addition was a cover made from Cardboard that slips over the Mirror and therefore protects it from any dust ensuring you always have a clear view without having to clean up every time you have to Sharpen a Tool. In the picture below you can see how the Mirror [with Cover On] is attached to its support and how by using a small clamp to attach the assembly to a piece of Angle fixed to the Bench Grinder support platform. This allows for fine adjustment of the Mirror position to ensure the best view when Sharpening, although once I found the best position I have not made any further adjustments as one position appears to suit all your requirements.
|
|
|
|
|
LaymarCrafts Woodturning is the Web
Site of Richard & Sheila Stapley Last update 06 May 2008
|
|
Web Site Design & Construction by Richard Stapley. |