| LaymarCrafts Woodturning | Hints & Tips |
| Storage of Polishing Cloths |
I mainly use the Yellow type Domestic Dusters for Polishing and Buffing my work, as these are relatively cheap (try your local 50p & £1 store) and they do a reasonable job on smooth surfaces, but I do not use them when working with Burrs or when Polishing and Buffing Textured surfaces.
The one problem I had was where do you put the Duster when it is not in use? if left lying around it is likely to pick up shavings or something worse, which often has dire consequences on the Turned Piece when next used.
My solution came to me one Christmas as I delved deep into the Jar of Quality Street to get my favorite "Choccy". Here was a Plastic Jar big enough to get your hand into which was both safe and light enough to be usable in the workshop.
I was fortunate that I had some very large Cable Ties, however you can use smaller ones coupled together or make some thin metal straps, you could even screw it directly to the beam but being thin Plastic it will not withstand to much abuse and additional support, large penny washers etc., should be used.
Hint Update:-
I recently had one of those moments in the Workshop where a Bowl Blank on the Lathe decided to imitate a Flying Saucer and demolished my Polishing Cloth Holder [oh the wisdom of using a Plastic Jar] and I needed to find a solution, without buying a whole Jar of Sweets.
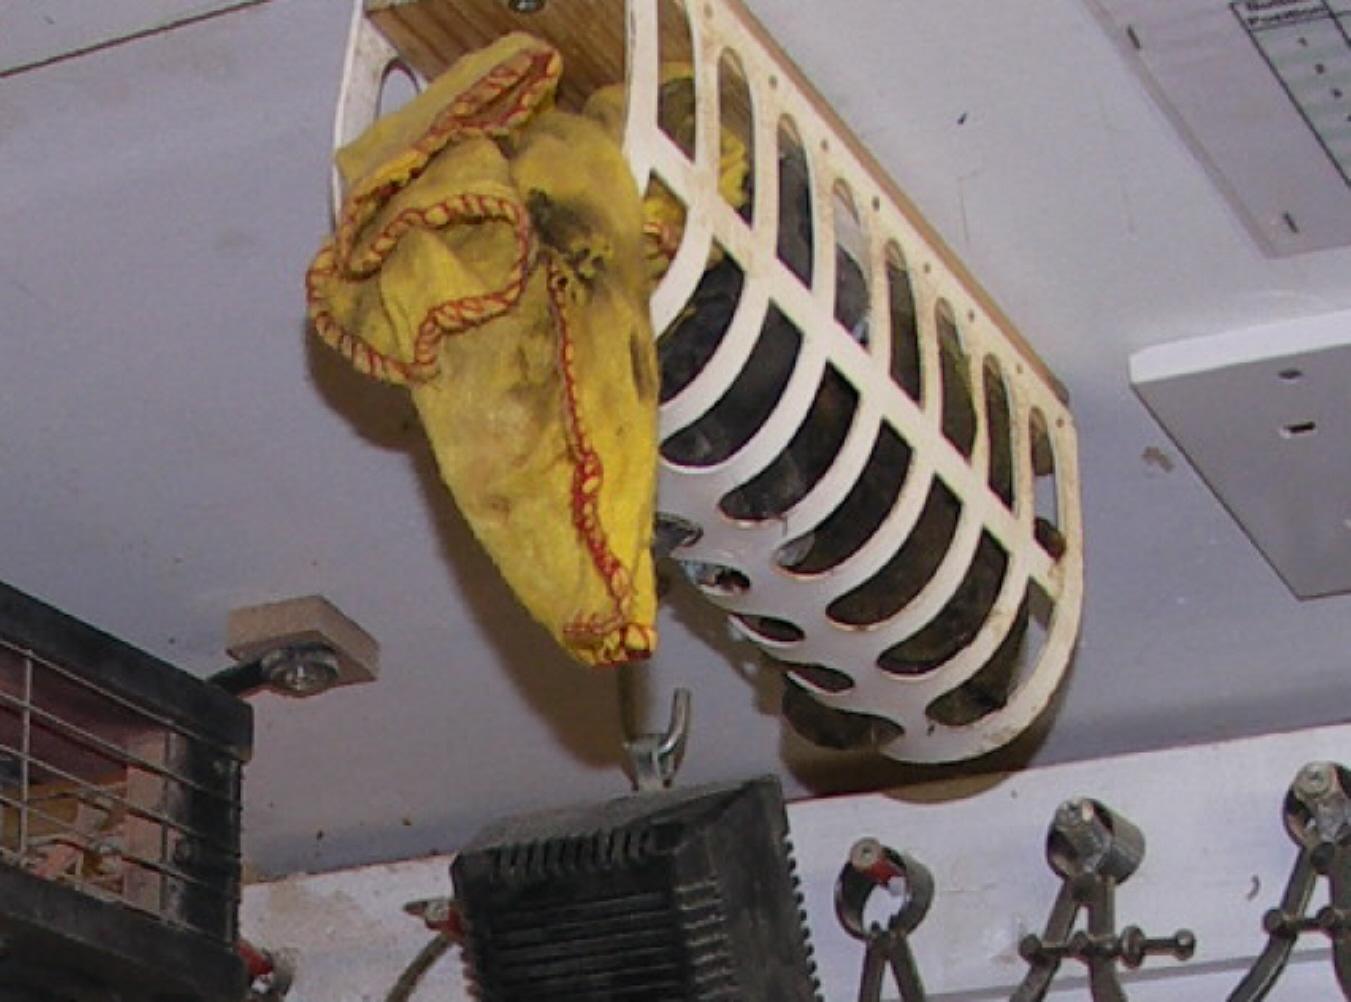
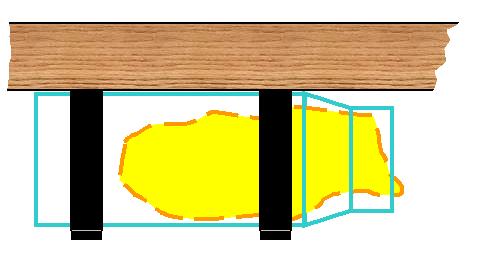
Some time ago we used one of those must have gadgets in the Fridge to hold a Bottle of Wine, this was no more than a perforated sheet of flexible plastic that hooked onto any one of the shelves in the Fridge forming a Gutter Shape holder for the Wine Bottle.
This became redundant, after one of the locating hooks broke off, yet had found it's way into the "never throw anything away bin" in the Workshop.

By applying the same technique, only wrapping it around a Roof Support Beam and securing it in place with 4 woodscrews, I could form a "U" shaped holder that has a distinct advantage over the previous solution in as much as it does not trap any Dust which was the case with the Jar previously used.
In the picture below the Holder re-positioned and now fixed to a Wooden Base attached to the Ceiling of the Workshop.
|
|
| Chuck Modifications |
One of my personal whinge's is the fact that there are too many chucks and a lot of good accessories but they are not interchangeable from one make to another. Why?
I use the APTC Chuck and have adapted it for my use and I detail here some of the easy and simple modifications that I have carried out.
First off my Lathe has a spindle locking bar that locks the spindle in one of two positions 90° apart, only one of these positions is usable to ensure the Chuck Key Socket of the Chuck is in the Correct Position, To ensure that each time I lock the Lathe Spindle in the correct place I simply drilled a shallow (approx. 2 mm deep) 5 mm diameter recess into the Chuck Mounting Boss opposite the appropriate Key Socket and filled it with Red Paint.
By ensuring this "Red Dot" is now at the Top, I can quickly lock the Spindle in the correct position for the ideal Chuck Key Position.
One of the problems with these Chucks is that you can extend the Jaws beyond the Body, now before you all shout "Fool", how many of you do it? every reference to Chucks tells you you shouldn't do it but I'm sure the vast majority of us at some time pushes it to the limit.
The real trouble is that when the Chuck is spinning the protrusions become unclear and when we apply that Ancillary item that comes with every Lathe the "Hand Brake" the rest as they say is History.
My solution is to simply paint a Red stripe 15 mm wide around the Jaw's end of the chuck body, even at full speed this no go area is clearly defined.
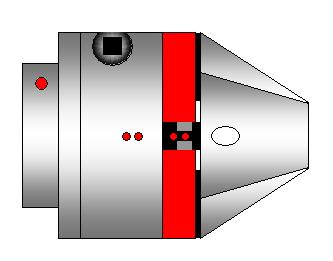 |
The Jaws for these type of Chucks have a specific sequence of assembly i.e. Jaw #1 must be fitted into Slot #1 first and then #2 etc. On my Chuck and the various Jaw sets I own, the marking was unclear and not too easy to see under certain circumstance and this definitely does not improve with time and use. I mark the major components with a shallow recess, either drilled or with a center punch, filled with Red Paint, 1 dot for Jaw #1, 2 dots for Jaw #2 and so on. This way you always fit the correct Jaw into the Correct Slot each and every time. |
As a bonus the #1 Jaw on my Chuck happens to be at approximately 10 o'clock when the Chuck is locked in place as described above and this makes fitting the first Jaw very easy indeed.
In a later Hints & Tips Articles I will
show you my solution for Storage of the various Jaws and the Accessories that I
have, plus a Mini Button Jaw Chuck for reverse Turning small Pots.
| Chuck Key Holder |
The two Chuck Keys for my system (a short key and the long key) have often gone astray, in the inevitable Shavings that are produced in vast quantities, so two large Screwed Eye's screwed into the edge of the Shelf right behind the Headstock of the Lathe was a convenient place to store the Keys.
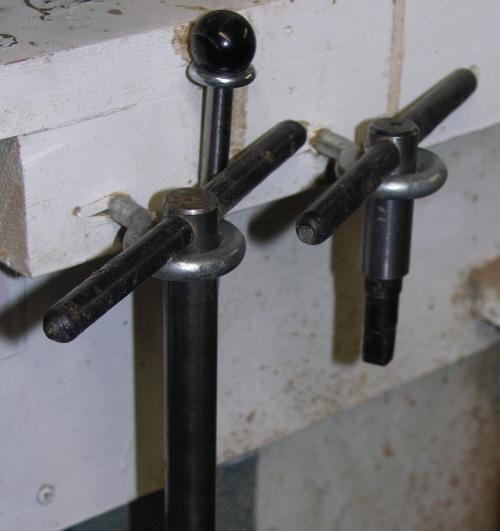
Alternatively any item with a suitably sized hole drilled in it can be used to store not only the Lathe Chuck Key(s), Tommy Bars, one of which can also be seen in the picture, but also the Jacobs Chuck Key, another item that often gets misplaced, as well.
At the same time I decided to make the
Cross Bar of each Key more comfortable by fitting a length of Heat
Shrink Tubing to the Bars this also gives a superior Grip when trying to get
that extra quarter turn.
|
|
|
LaymarCrafts Woodturning is the Web
Site of Richard & Sheila Stapley Last update 19 July 2007
|
|
Web Site Design & Construction by Richard Stapley. |