| LaymarCrafts
Woodturning |
Hints
& Tips |
| Mini Gripper Chuck, Support |
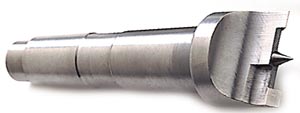
I think the
Craft Supplies Mini Gripper is a fantastic little Chuck (if that is in fact what
it is) that is both simple and efficient, every Woodturner should own one.
Used
correctly it is very safe and can support many sizes and shapes of Wood for all
manor of Turned Items, I regularly support Blanks of Oak up to 250mm x 50mm.
(10" x 2")
The one
problem is that it would not safely fit my Lathe, two versions are available,
Screwed ¾" x 16tpi for Fitting direct to the Spindle or with a Morse Taper
(both #1 & #2 are available). This Thread Size is not the same as that
on my Lathe, Oh! when are Manufacturers going to standardise on a Thread
Size for Lathes????
The use of a
Morse Taper fixing is not to be recommended when applying Cutting Forces from
the many different angles that occur when Turning using this Chuck, for this
reason the Gripper is available with a Long Bolt to enable you to clamp it in a
Hollow Spindled Headstock, here lay my second problem, my Spindle is Solid at
the back end and therefore not suitable for this method of fitting either.
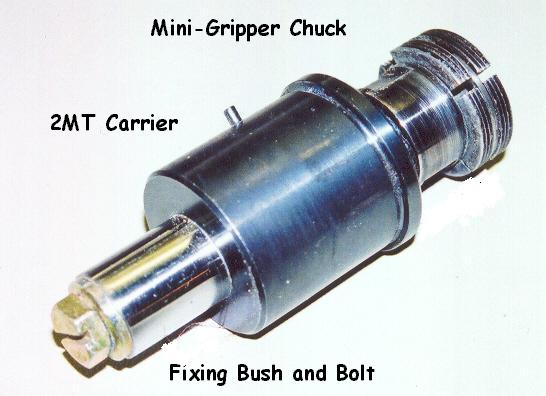
Not
being one to give up so easily, I new I had a spare Morse Taper (#2)
carrier from my old Chuck System that I knew fitted
into my APTC Chuck system and this became the basis of my solution.
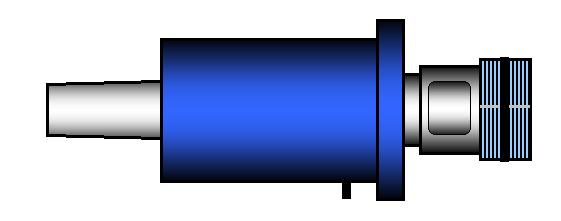
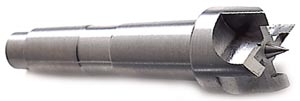
The
illustration above shows how the Gripper fits into the Morse Carrier and the
protrusion of the Gripper's Morse Taper out the rear of the carrier. The end of
the Gripper is drilled and Threaded so there was provision to clamp the assembly
firmly in place, if used like this the Gripper could easily come out of the
Holder or the Headstock Spindle during use..
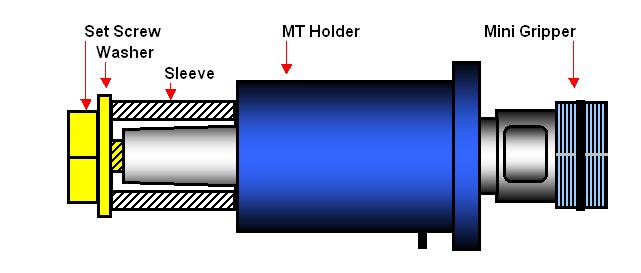
I fitted a
suitable sleeve (I used a Gas Pipe Barrel Connector) over the protrusion, then
with a Set Bolt and Thick Washer clamp the assembly tightly together, you need
to make sure that the sleeve is at least 5mm longer than the amount the Morse
Taper protrudes through the Carrier so that you do not "Bottom Out"
when fully clamped up.
As I was to
make this a permanent item I added a few drops of Thread Lock to the Set Screw
before assembly which is now ready for use and totally safe and adaptable for
those Lathes that are not accommodated by the original design and you also have
a Chuck System that will take a #1 or #2 Morse Carrier.
Perhaps the
Guy's at CS will set there mind to adopting this solution to open up the number
of potential users and maybe show there gratitude. I await your call CS.
In a recent
discussion on the rec.crafts.woodturning Newsgroup on the Web, there was a
question relating to the use of a Jacobs Chuck in the Lathe Headstock Spindle
and the fact that it kept coming loose.
It is
important to recognise that any Morse Taper Fixture is primarily designed for
Compressive Forces i.e. a Force that works to "Push" the Male Morse
Taper into the Female Morse Taper Holder.
It is both
un-safe and therefore un-wise to use it in any other way, the system
described above works in exactly the same way for any Morse Taper mounted item including a
Jacobs Chuck allowing this to be used to Hold and Turn Small Items in Safety as
the Morse Taper is no longer the Prime Retention method.
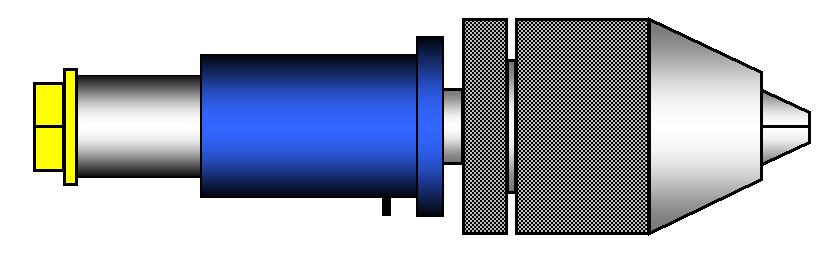
Holder
for Drives, Revolving Centres & Jacobs Chuck
All of the above have one
thing in common, they rely on a Morse Taper as their prime means of Fitting into
either the Headstock Spindle or Tailstock Barrel of the Lathe.
It is imperative that the
Morse Taper (both the Male and Female) are kept Clean, do not get Rusty and
remain Un-Damaged, if not then at best the Item will not fit at Worst it will
become Jammed into its mating half.
These items, and the many
others we have, are often if not always left un-protected and not seen as a
potential trouble area, yet the Woodturning News Groups on an almost regular
basis have a Thread about yet another Jammed Morse Taper.
The question is always
resolved with helpful advise, sympathy and often a suggestion of using Brute
Force and Ignorance as the solution. But the question is never asked as to WHY
it became stuck in the first place.
The problem is always
worse if the offending item has become stuck in the Headstock end of the Lathe
and you do not have an Hollow Spindle, and Oh! yes you forgot to replace the
Thread Protector when you took the Face Plate or Chuck off.
So cleanliness is the
order of the Day and for the Spindle and Barrel Morse Tapers (the Female part) I
can recommend the Plastic Morse Cleaners that are now available from most
Woodturning Suppliers, they may not be Cheap but they are worth every penny if
you never have a Seize Up again.
That leaves the Male
Morse Taper on the Centres, Drives and Chucks to maintain in Good Order, my
solution was to make a Rack into which the Items in question could be Slotted
and therefore protected from Dirt, Rust and Damage.
The Holder
supports the various Items with the actual Morse Taper being fully Protected
against Rust, Mechanical Damage and Dirt using the simplest of Materials.
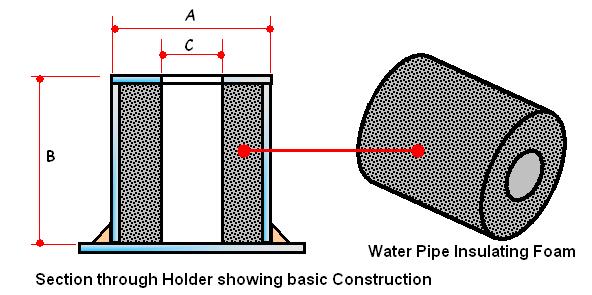
The main
body is from Aluminum, but Hardboard or Plywood would also be suitable, whilst
the inner filling is Water Pipe Insulation (from your local Plumbing Suppliers).
I started
with 6 off 75mm (this is suitable for 2MT Morse Tapers for a 1MT then a length
of 65mm should be adequate) lengths, this being equal to the longest Morse Taper
I had in my collection, of the 15mm Pipe Insulation Tube which is 40mm Ø
overall and, providing that no two items are greater than this diameter, you can
place
them in a line and stick them together with a suitable Contact Adhesive.
This now
determined the final dimensions for a 6 way Holder of course if you require more
or less then the size will be determined accordingly. Although I had 6 in line
you can arrange it how you like i.e. 2 x2, 4 in line, 2x3 etc.
This
"Block" of Tubes were now stuck to the Base board which was 260mm long
by 50mm wide, I then applied the two sides and the ends sticking them to the
Insulation Tube with Contact Adhesive.
This now
formed what was a very strong Aluminum Box fitted out with Insulation Tube but I
needed to seal all of the joints and I therefore filled the gaps at each corner
with Silicone Sealant and placed a fillet of Silicone all around the Bottom
Joint sealing the Sides and Ends to the Base.
I now cut a
Top Plate into which I drilled 6 off 20mm Ø Holes (for 2MT Morse Tapers for a
1MT Morse you will need a 13mm Ø Hole) at 40mm Pitch to line up with the Centre
Holes in each of the Insulation Tubes and then Stuck this in place again using
Contact Adhesive.
The Holder
is now complete and after a coat of Paint it can be either Screwed, Stuck or
Left Freestanding on a convenient Shelf.
Before
placing the Items in the Holder I smeared the inside of each Tube with some
Light Oil and repeated this three or four times over the next Month, the Oil is
absorbed by the Foam Tubes and offers a light Lubrication each time an item is
inserted this will ensure that the Morse Tapers remain
Rust Free.
|
|
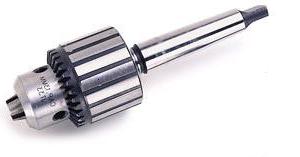
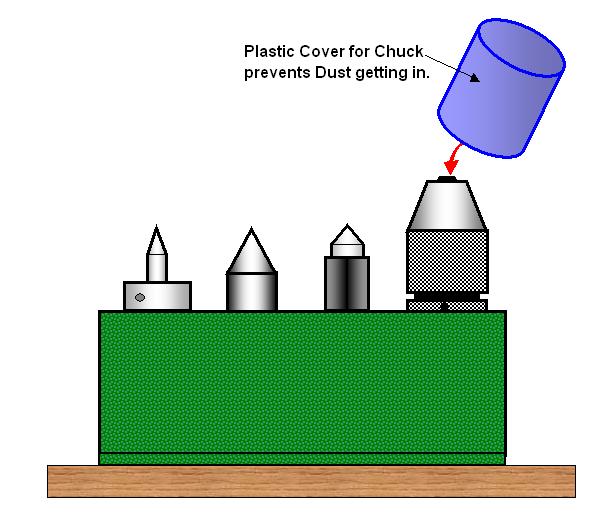
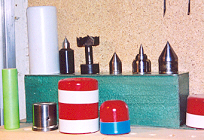
Picture
of finished Holder / Rack with various Revolving Centres and Drives plus
my Jacobs Type Chuck which I keep under the White Plastic Cover to keep
out the inevitable Wood Dust.
This Cover is a
Plastic Bottle type Container with the Top Cut Off it once contained
Wood Dye and was the ideal size for the Chuck.
When I remove any
Item to use it I replace the vacant Hole with Small Plastic Plug made
from a Blind Grommet to ensure no Debris gets in to the vacant place. |
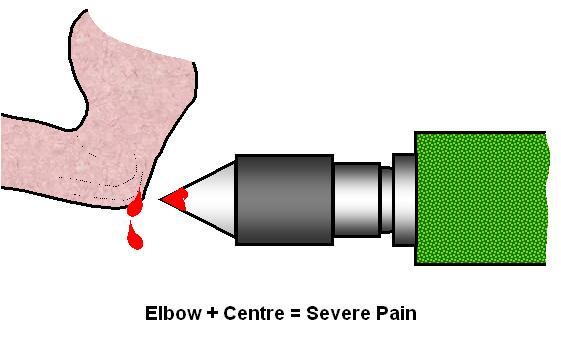
Elbow Protector
One of the most Painful
Experiences I have ever had in the Workshop was when I Stabbed my Elbow on the
Revolving Center in the Tailstock, this was so Painful I swore I would never
have a situation where I could repeat the Experience.
Removing anything from
the Tailstock immediately after use is the obvious solution but we are at best
Lazy and at worst have a strong belief in our own immortality.
I use 4 different sizes
of Live Center plus a Drill Chuck c/w Drill all of which are an Accident waiting
to happen when fitted in the Tailstock and not being used, and therefore any
solution needed to accommodate all of these variations.
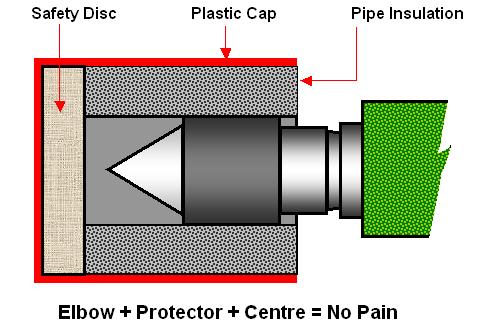
I started
with a Plastic Type Cap from a Deodorant Bottle for one size and a Plastic
Bottle with the Top Cut off for the second size and this gave me two Protection
Caps, these two sizes accommodated the various sizes of Revolving Centers
I have.
Into the end
of each Cap I fitted a Safety Disc made from 3/8" Plywood, the Plastic
alone will not be sufficient to give the degree of protection needed, then using
Foam Pipe Insulation glued into the Cap, with a Bore Diameter to suit the
Revolving Center, to form a firm grip to hold the Protector onto
the Center.
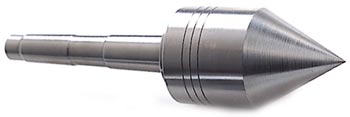
|
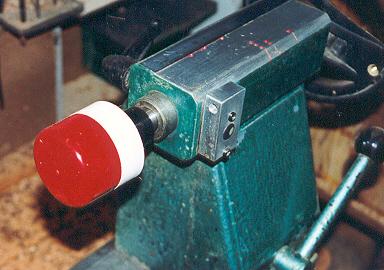
The Protector in place
offering full protection against that Oh !*@~!
Moment.
|
|
LaymarCrafts Woodturning is the Web
Site of Richard & Sheila Stapley
All Content, Articles, Pictures & Diagrams as Presented are the ©
Copyright of LaymarCrafts & Richard Stapley
Last update 19 July 2007
All Rights Reserved |
|
Web Site Design & Construction by
Richard Stapley. |